Play KGuru Drive & KGuru Quest on a Smartphone – Game Author & Player QuickStart Guide


We’ve made it simple for your learners to play your Knowledge Guru games on their smartphones. Let’s dive into how it works.

Game Author: Invite players to your game by sharing your game’s URL

As a Game Author, whenever you make your Knowledge Guru game live you’re immediately given your game’s unique URL that you can share out in an invitation email. This is how players know where to go to play. With Drive and Quest games, players who arrive at your link on their iPhone or Android smartphones will be able able to register for your game and then download and launch either the KGuru Drive or KGuru Quest app.

Player: Download, Login, and Play

Once a player has registered for a Drive or Quest game, they will be able to tap a link to download (or launch if it is already installed) the KGuru Drive or KGuru Quest app where they can login and see a list of available games. That’s it, they’re all set. On-the-go learners will never need to access a computer to play Knowledge Guru Drive or Quest. Every interaction and screen has been optimized for the mobile experience. The apps also feature push notification support so players can select to receive notifications when it’s time to come back and play a new topic.

You can direct players to download the Knowledge Guru apps from our ‘apps’ page.


5 Keys to Success with Legend and Quest

Want to make your first Knowledge Guru game roll-out a success? While the platform itself is easy to use, a bit of planning and preparation goes a long way. The following “keys to success” will help you make the right decisions before you start designing your Legend or Quest game… and help you make your game content instructionally sound.

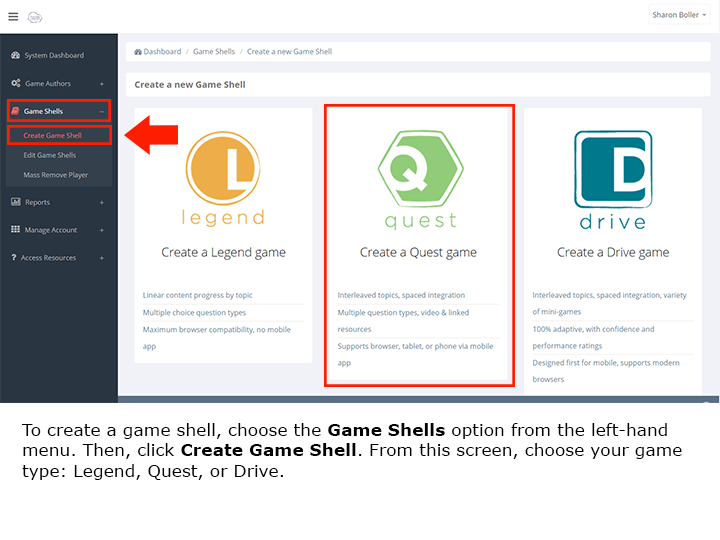
1) Choose the right game “type” for your endeavor.

Knowledge Guru offers you three options: Drive, Quest or Legend. Each one can a give you an impactful learning experience, but this article focuses on Quest and Legend. Sometimes either option is equally good. Here’s a few of the major things to consider:

  • Do you HAVE to support IE8? If so, use Legend. Quest will not work within Internet Explorer 8.
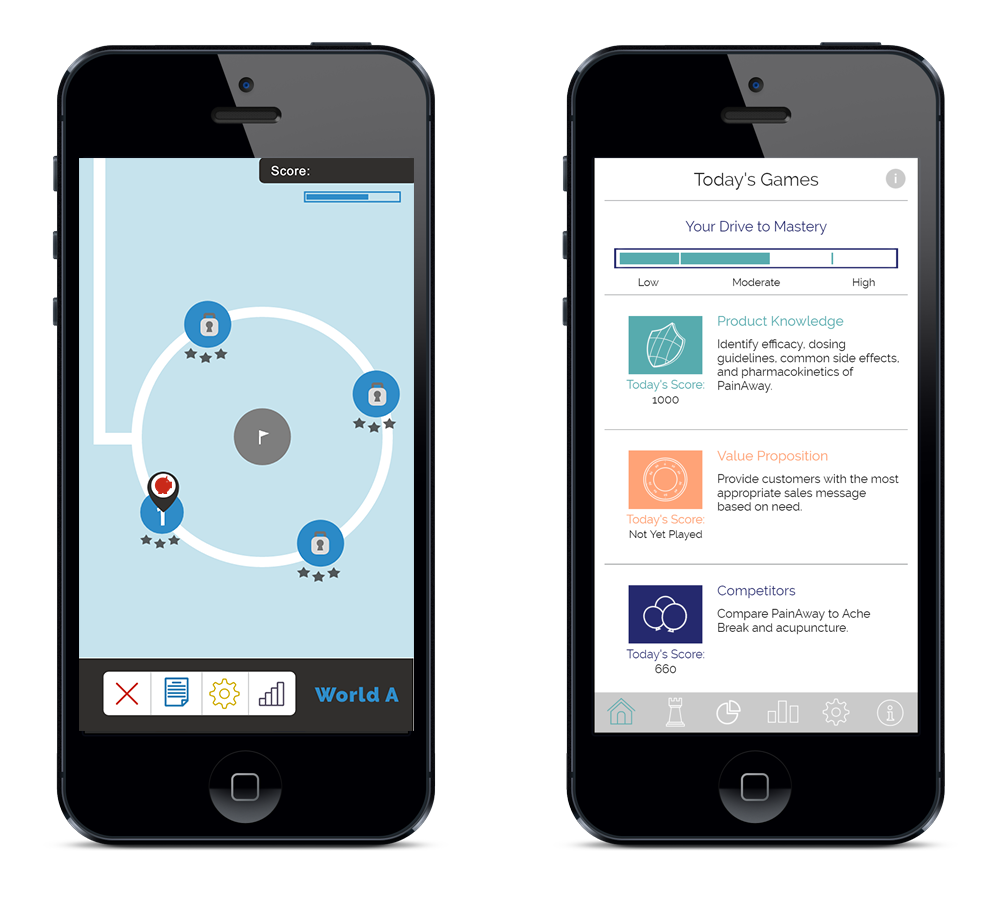
  • Do you want people to play as part of a live event? Either game type can be used. Legend is the optimal choice if you want to break up game play throughout the day and have players focus on a single topic per play session. Quest is a strong option if you want the game to serve as an overall review of the day. You can have players complete a single world within the game, which would include all the day’s topics. They can then finish their games on their own – getting two additional repetitions of your content following your live event.
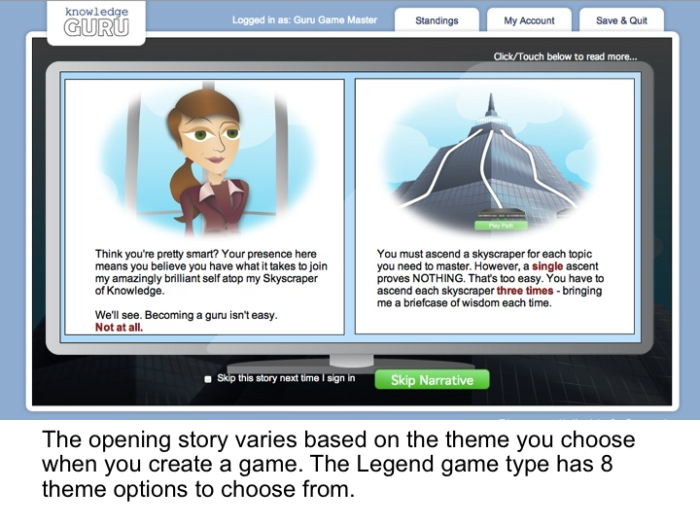
  • Do you have a theme? Legend gives you 8 different themes to select from; Quest gives you three. Some customers even opt for a custom-made theme. Which one is right for your event/learning experience?
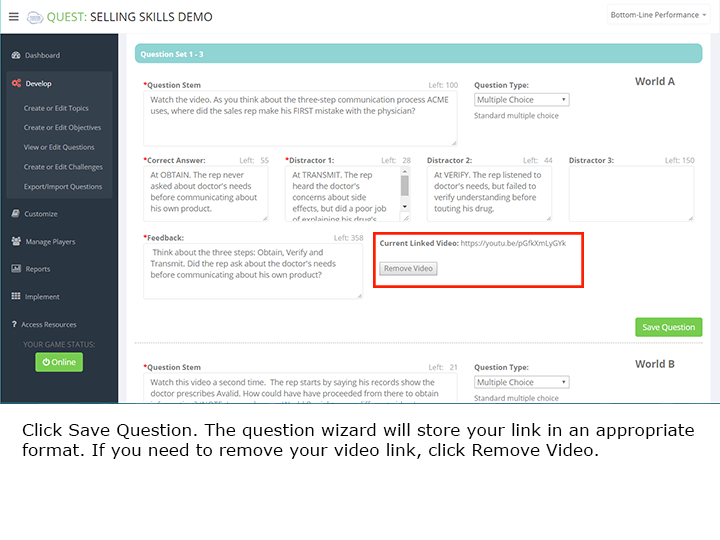
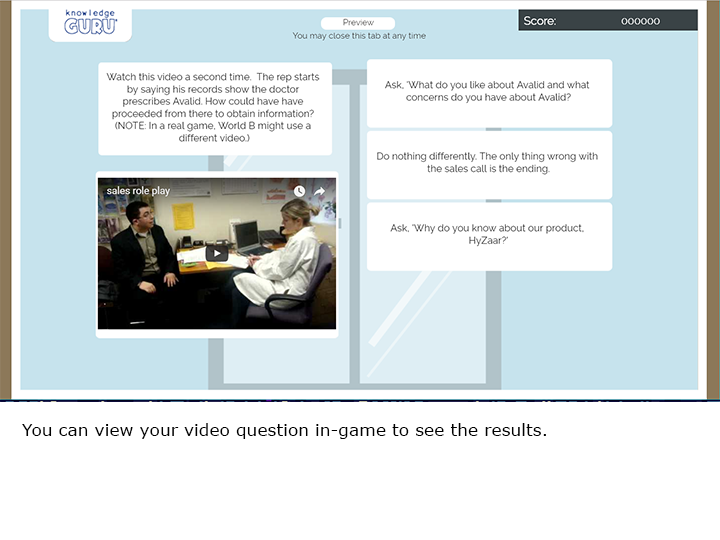
  • Do you want to incorporate video? Use Quest. Legend does not support video within the questions.
  • Do you want to include “performance challenges” as well as the question/answer format? If so, choose Quest.

For more detailed comparisons, you can check out these Knowledge Base articles that do a detailed comparison of Legend and Quest.

2) Make your game smaller as opposed to bigger.

Both Legend and Quest are designed to maximize learner retention of content. However, if you overload your game with too much content, you will hurt your players’ ability to remember.  Novice authors can go a bit crazy on crafting questions and suddenly find themselves with 8, 9, 10 or even 11 question sets within a single topic. The result is player fatigue and overload on their brains. They end up remembering very little.

If you truly have lots and lots of content to cover, consider crafting several “mini-games” that can be spaced out. The Legend game type is particularly good for designing this type of solution. You can have a highly effective Legend game that has only three topics with three question sets in each topic.

3) Get good at writing question “sets”

The single biggest challenge novice game creators have is recognizing when they are not writing iterative questions. Our Knowledge Base has a great article on how to write iterative questions. We encourage you to read it before you create a game, or to evaluate a game you’ve already created. Here’s a terrific formula to think about when you craft a question iteration:

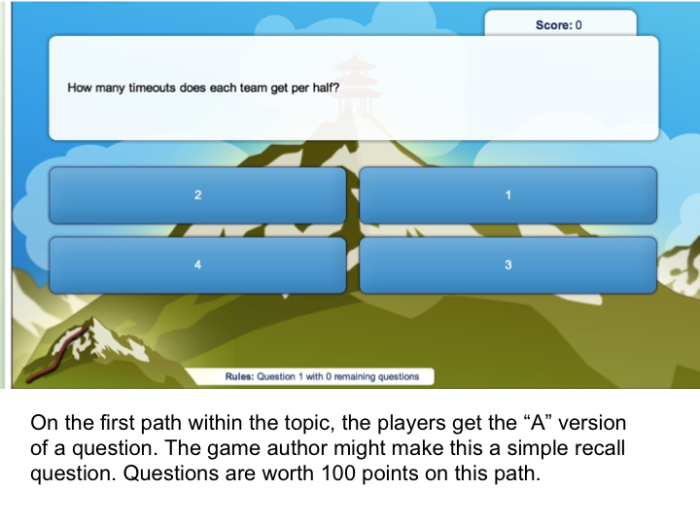
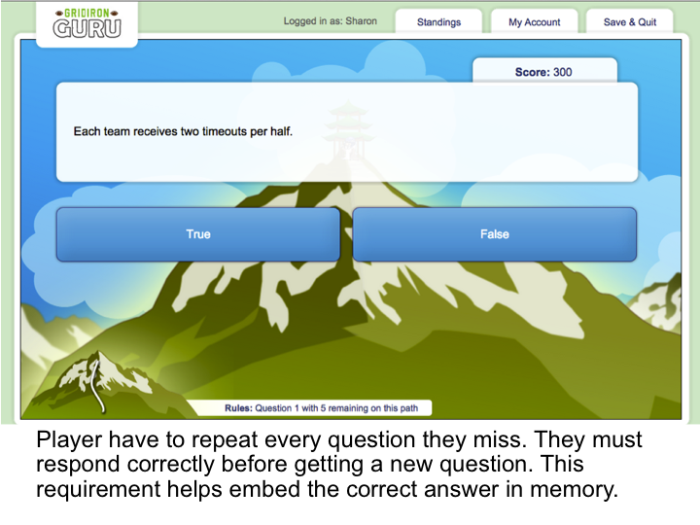
  • Make the  question on the “A” path (Legend) or “A” world (Quest) a recall of the fact. This can be done as a true/false or a multiple choice option.
    • Widget A has three benefits. Two of these are durability and low cost of operation. What’s the third?
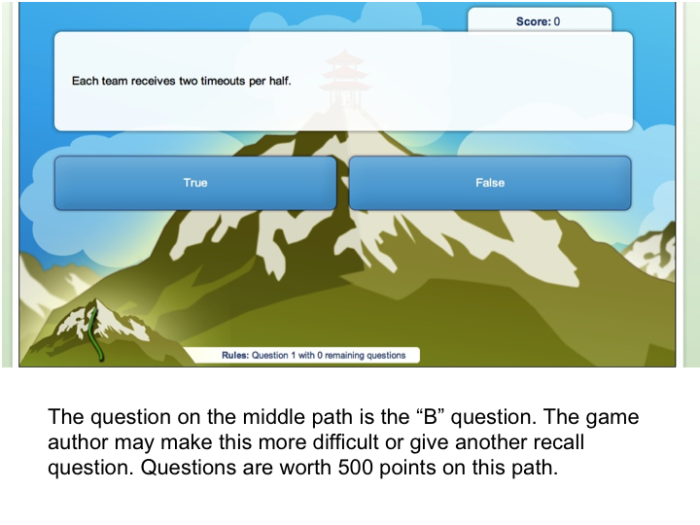
  • Make the question on the “B” path or world a bit more difficult by crafting a fill-in-the-blank or having them reference.
    • When you sell Widget A to customers, you need to share three benefits: ______ , ___ _____ of operation, and _____ease of________.
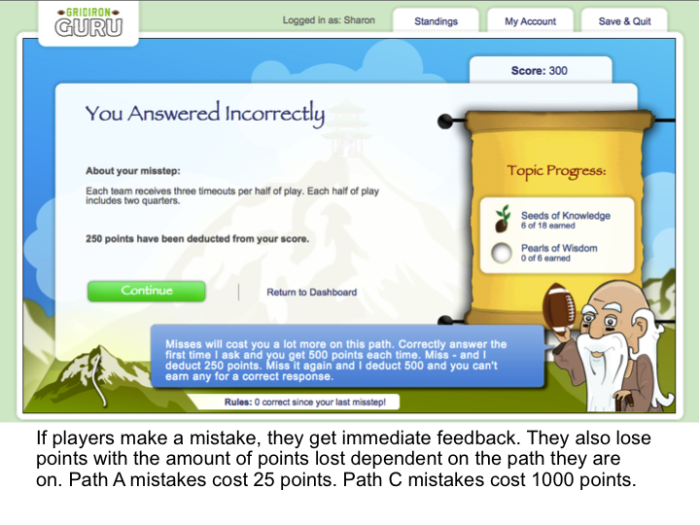
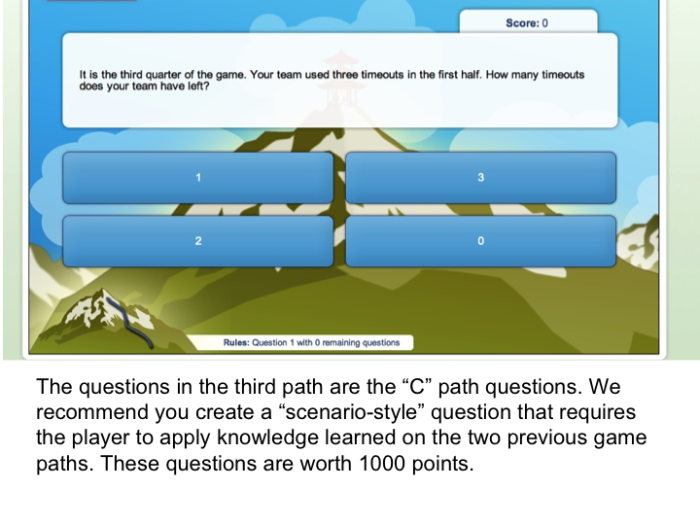
  • Make the question on the “C” path or world scenario based. Have them incorporate the fact into a job situation they would typically encounter.
    • You are meeting with Joe at ACME construction. He is concerned about replacement costs of Widget A. Which of the three benefits below is the one you should communicate to Joe? (NOTE: The answer would be durability. The distractors would be the other two benefits.)

4) Make your questions contextual to the players’ jobs and personal to them.

We all care about what matters most to us. So make sure your questions place your players in their jobs whenever possible. Here’s a terrific “formula” to think about when you craft a question iteration:

  • You are in a lab….
  • Your manager wants you to….
  • Your customer asks….

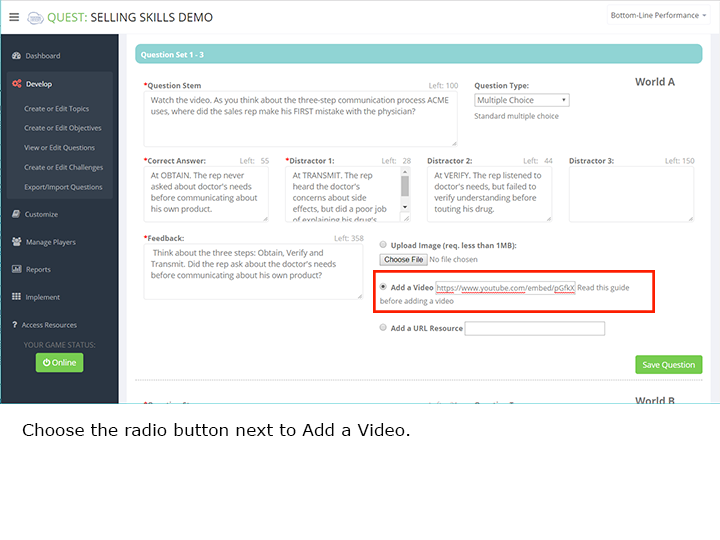
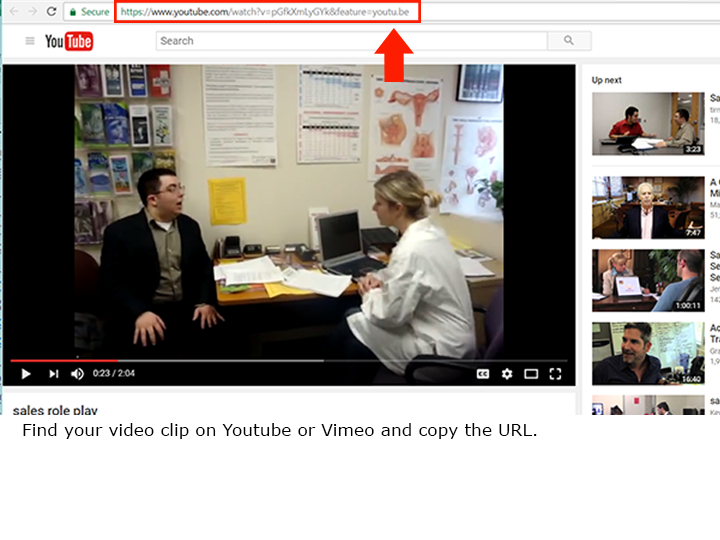
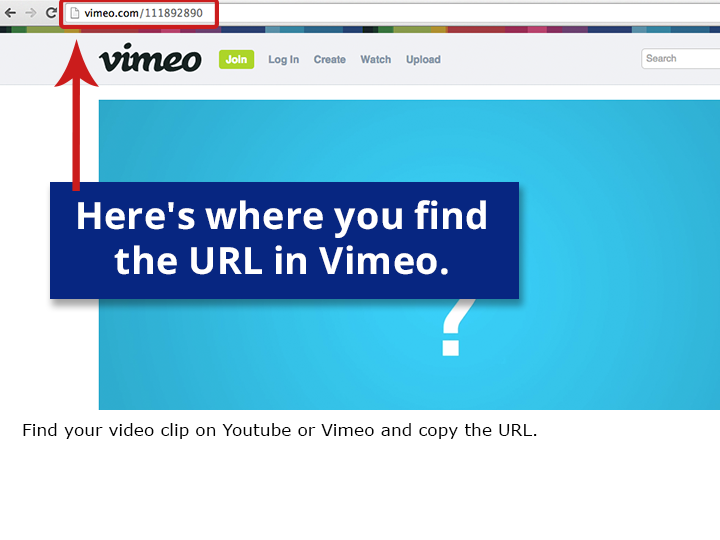
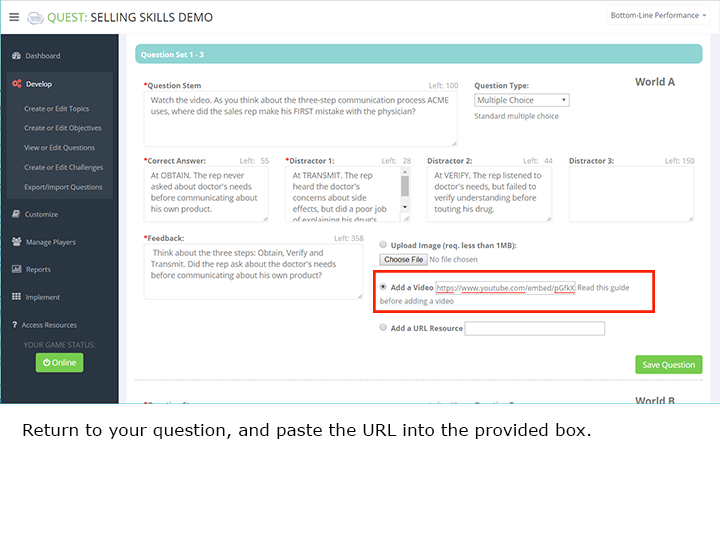
5) Incorporate visuals and video.

People respond well to images and they like watching short videos—just think about the popularity of YouTube. If you can show them instead of tell them, do it! Here are things you can do with an image, even one made in PowerPoint:

  • Give the player a context or “setting” for a scenario or a visual of what a customer might look like.
  • Present data that a player needs to analyze before responding to a question.
  • Show the flow of a process or the steps in a process.
  • Present a vignette of a selling situation, a feedback session, a customer inquiry, etc.

How to Make a Game Live So Players Can Access It

Once you have created the topics, objectives, and questions for your game you are now ready to make it live. Making it live is a simple task, but there are also some other things to consider when you are making your game ready for players. You also decide what kinds of email reminders your players will be receiving. It is important to know that Knowledge Guru will auto-generate email reminders to players who quit mid-game and then do not return after 5 days.

Follow these steps to make your game live so players can access it:

Quick Steps List

Steps for making your game live (ONLINE):

  1. In the authoring tool, select the IMPLEMENT option in the left-hand menu.
  2. Select the GAME ACCESS submenu item.
  3. Click the dropdown and change your game from offline to online. You will also see your game’s URL.
  4. For quick access, click the OFFLINE button below the left-hand menu to change the game to ONLINE status.

Click through the slide show below to see the steps in action.

How To Create a Game Author and a Game Shell

Every Knowledge Guru game must have at least one, but up to 10, Game Author(s) associated with it. A Game Author is the individual who creates the game content, customizes the game, and implements the game (e.g. makes it go live). The game author can also access and export game reports that detail player progress, player performance, etc.

You must be designated as a system administrator within Knowledge Guru to create a game author.

To create a game author:

  1. Log into your Knowledge Guru account at: theknowledgeguru.com/login/
  2. Select your company from the game list. If you have no games, you will automatically be logged into your system administrator account.
  3. Select GAME AUTHORS/CREATE GAME AUTHOR from the left-hand menu.
  4. Enter the game author information and click CREATE GAME AUTHOR.

After you have a game author in your system, you can create a game shell and associate the author(s) with the shell. Here is how:

  1. From the left-hand menu, select GAME SHELLS/CREATE GAME SHELL.
  2. On the screen that appears, choose the game type you want to create.
  3. Fill in the game name, and game URL.
  4. Select a primary author and up to nine secondary authors.
  5. Choose which game type you want in the drop-down menu (QUEST/LEGEND/DRIVE).
  6. Click ‘CREATE GAME SHELL.’

Click through the slide show below to see the steps in action.

Optimal uses for a Legend Game

Knowledge Guru has three game types that offer different gameplay experiences. Each game type uses a question/answer approach, but the game play within each one is different. This post focuses on the Legend game type and how it compares to the Quest game type. The slideshow below gives a walk-through of the basic game play experience:


Here’s a summary of reasons to choose Legend over Quest:

  • You need to support IE8 browser. IE8 is an outdated browser, but many corporations still want to use it. Quest requires a modern browser (IE9 or higher, Chrome 14 or higher, Firefox 3 or higher, Safari 4 or higher). Legend IS our answer to  the IE8 requirement some companies still have. It has less sophistication in its game play because IE8’s functionality won’t support many elements we take for granted when we see them in modern browsers. Quest will not work in IE8. Legend does.
  • You want people to play a short game in a single sitting.  Legend is great for making a short game if you limit the number of question sets you include. Quest’s entire game play experience is optimized for play over time. While people can – and do – play across multiple time periods in Legend, Legend is better than Quest for a very short game that doesn’t have a lot of content.
  • You only need a two-topic game. Quest requires at least 3 topics. With a Legend game you can have a one-topic game if you want (though we don’t recommend it).
  • You want players to be able to see game standings across all players. Legend includes a STANDINGS tab in the game so players can see how all players are doing and what all the scores are in Normal mode of play.
  • You like the idea of two rounds of play – normal mode and grab bag mode. We have lots of clients who will invite learners to play to “Knowledge Guru Mastery” before coming to an event. They then have a live Guru Bag competition at the event itself with the live leaderboard displaying while people play.
  • You want a wide array of theme choices. Legend lets you select between 8 different theme options, which can offer variety in the aesthetics.

If you want to compare/contrast against the Quest game type, check out this article on optimal uses for a Quest game.

How to Export and Re-Import Questions and Responses in a Legend or Quest Game

Often you will create Knowledge Guru games by partnering with subject matter experts (SMEs). These SMEs want to review the game content after you create it. Legend and Quest give you an easy way to facilitate this review by letting you export the game questions after you create them so SMEs can edit question content, response choices, or the feedback players receive when they make mistakes.

How to Export your Game Questions

  1. Click the DEVELOP option in the left-hand menu within the authoring tool.
  2. Select Export/Import Questions.
  3. Follow directions to export a .CSV file. (Note: If you are using Safari browser, you need to right-click the download button to export. Otherwise, you will open a new tab instead.)
  4. When you open the downloaded file, select “Save-As” within Excel.   Give the .CSV a name such as “GuruGameQuestions.” Do not save as an Excel file. Keep file in .CSV format.
  5. Reformat as desired to alter column widths or text alignment for easier reading. Do NOT delete or rename any of the columns. You may add a temporary column labeled “Comments” for your SME to type comments into. This column needs to be deleted before you re-import the .CSV file.
  6. Provide your SME with a link to the game and have him/her register to play. Provide the .CSV file with instructions to make edits, as desired, to the game question stems, responses, or feedback columns. Ideally, have the SME use a different colored font for changes so you can easily spot the edits.

How to re-import after the .CSV is edited

  1. When you get the .CSV back from your SME, rename it again (e.g. “GuruGameQuestions_SMEVersion.csv) so you can retain the original questions as well as a version with the SME’s edits.
  2. Click the DEVELOP option in the left-hand menu within the authoring tool. Locate the Export/Import Questions sub-menu item.
  3. Follow the directions to import the .CSV. The new content will appear.

Notes

  • If your SME inserts more characters than a field allows, the authoring tool will simply cut off the item when the character limit is reached. You will need to review each item to make sure the SME hasn’t added too much text.
  • You may want to do a spell-check before you import the .CSV to catch spelling errors or typos before importing.
  • You may choose to add a “comments” column if you want to insert questions for the SME to consider in his/her review. (e.g.”Did we accurately describe this concept with this question?) If you do so, be sure you delete the Comments column before you import the .CSV file with the edited questions.

Click through the images below to see the steps in action.


How to Mass Upload Players into a Guru Game

Do you want to spare your players the task of self-registering to play a Guru game? Some organizations do. If email verification is not needed, you can opt to pre-register players for a Guru game. Perhaps you are unveiling a Guru game as part of a conference experience or as part of a live workshop event. In these instances, your goal is to get everyone playing as quickly as possible with as little effort as possible.

If you prefer to let players register themselves for your game, they can do so. Here’s how to let players register themselves.

Mass uploading your players ahead of time may be a perfect solution. You can do this mass import within the MANAGE PLAYERS option in the left-hand menu. You select the Add Players submenu item within it. The Add Multiple Players section is located below the Add a Single Player section.

Two important tips:

  1. Download and use the .CSV template we provide. It tells you exactly what information to include.
  2. Define your user registration fields before you mass import players so that the .CSV file you download includes columns for them.

NOTE: Safari users need to right-click to download the .CSV file.

Click through this slideshow to see a quick tutorial.

Incorporating a Video, Photo, or Link into Quest Feedback

Media is the first place most people turn when they need to quickly learn something, whether it’s to watch a video to see someone do something, look at a photo to see what good looks like, or click a link for a deep dive into a topic. Quest games support adding videos, photos, and links into feedback. The process for adding media to Quest feedback is like adding media to the question stem.  

From the player side, learners see the resource alongside the text of the feedback, shown here:

Helpful Tip: 

We officially support links from Youtube and Vimeo. However, you may try links from other video services. If you choose to link videos from an alternate source, always be sure to preview your video questions before sending your game out to players. 

Click through this slideshow to view a quick visual tutorial. 

Creating an HTML link in a Legend game type

Want to link to an external website from within a Legend game? Here are your steps:

1) Locate the URL you want to incorporate into the game question.

If your URL is long, shorten it. The characters in the code string count against the total number of characters you can have in the question. Free services exist that enable you to shorten the URL address. TinyURL.com is one to try. You enter your URL and it spits out a shortened code for you to use. In the example below, our original URL was 105 characters. By using tinyurl.com, we shortened it to 26 characters – a big difference.

2) Use the code we provide below, inserting your URL and any unique direction to your users. The portions shown in red are where you insert your unique information. The blue portions remain the same for any hyperlink you create. Pay attention to where quotations marks are used and where spaces are used.

<U><a href=”YOURURLADDRESS” target=”_blank”>YOUR ONSCREEN TEXT FOR USERS TO SEE </a></U>

Here’s an example of a question I wrote in the authoring tool. I included blue and red fonts to make it easier for you to see the code string and my unique information:

In a learning game, what’s the correct definition of a game goal?
<U><a href=”http://tinyurl.com/q2onwgv” target=”_blank”>Click here for more information about game goals versus learning goals. </a></U>

Here’s an image of how it looks to the player in the game:

Screen Shot 2014-11-21 at 12.16.08 PM


If you get an error message, you may have unintentionally inserted hidden characters into your code string. Here’s how to check:

  1. Open up an empty Word document and paste your string of text into it.
  2. Select the “Paragraph” button in Word (looks like a backwards P with a second line).
    • This makes all non-printable characters show up on the screen.
    • Remove any extraneous characters you see and then copy the code string back into Knowledge Guru.

Tracking Player Progress in Quest and Legend Games

Both Quest and Legend game types include a variety of reports you can use to track player progress. The authoring tool does a nice job of describing your report options so this article will not detail all options. Instead, we will focus on the types of information you might want to gather – and which report is the right one to use.

  • Log into your game's admin tool at kguru.co/login. Use your email address and password.

Reports Available for Either Quest or Legend Game Types

  1. If you want to know how a specific player is performing in the game, access the Player Progress Report.
  2. If you want to see overall player performance across topics (how well are people doing as a big group), access the Objective Overview Report (macro view) or the Question Overview Report (micro view).
  3. If you want to compare performance across groups, you can access a report whose name will mirror whatever name you created for your first custom user registration field. Example: The default name for this field is Location so if you did not change this field name and you set up multiple location options, then you can pull a report that lets you see how people performed in specific locations. The default report name is Location Performance Report. If you changed the field name of Location to something else, the report name will reflect this change.
  4. If you want to verify that people’s performance is improving across the three iterations of a question, access the Question Overview report. The “A,” “B,” and “C” iterations of each question appear in this report. Ideally, people’s performance will improve from the “A” version to the “C” version. If you are not seeing this, consider whether your question is worded poorly. This report can be very useful in identifying questions that may be confusing to players.

Reports specific to Quest Game Type

If you want to verify the number of players you have in the game and what their progress is within the game, access the Game Overview Report. This report tells you how many players you have, and what percentage have completed each World in the game so you can see how far most players have progressed. It also includes a detailed summary of your game’s topics, objectives, and questions and shows you the correct response % for those items. Finally, it lists the performance challenges that are part of your game.

This is a useful report to showcase to managers and stakeholders who want to see what a game is about and what content it includes.

PDF or CSV?

Many of the reports can be downloaded as a PDF or as a CSV file. Choose the CSV option if you think you might want to do further manipulation of the data. By downloading as a CSV, you can then re-save the report as an Excel spreadsheet, reformat it to your taste, and then sort the data to suit your needs.

Custom Report Builder Option – Both Game Types

You may have a need for some very specific data – and not care about other data. You can use the Custom Report Builder to choose what information you include/exclude from a report.

Auto Report Sender

You can create reports that are automatically sent to your stakeholders. Learn how here.