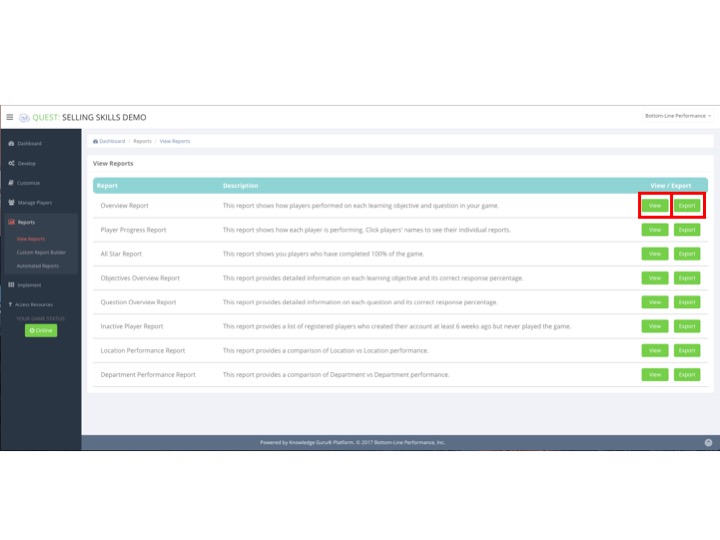
Both Quest and Legend game types include a variety of reports you can use to track player progress. The authoring tool does a nice job of describing your report options so this article will not detail all options. Instead, we will focus on the types of information you might want to gather – and which report is the right one to use.
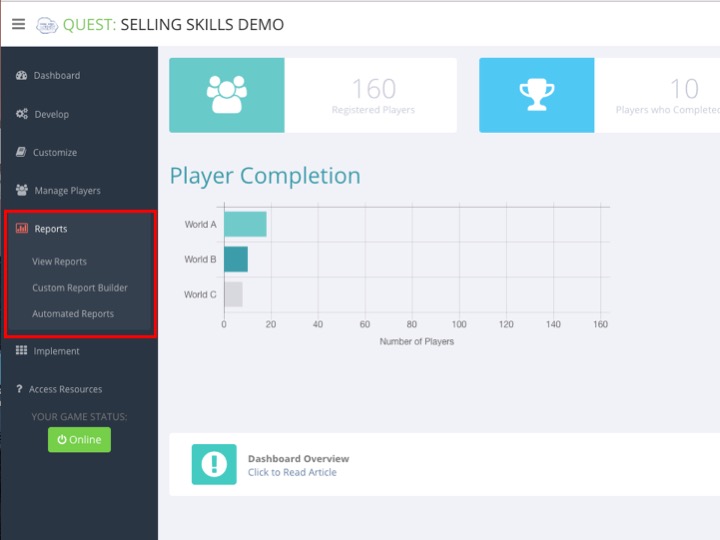
Reports Available for Either Quest or Legend Game Types
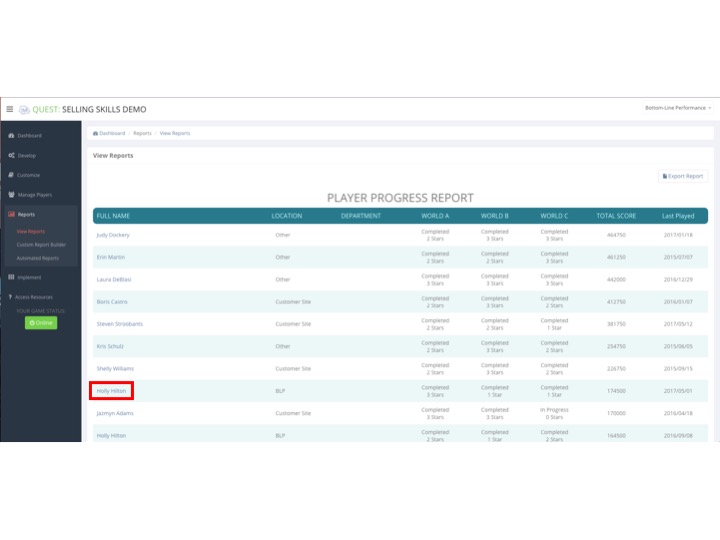
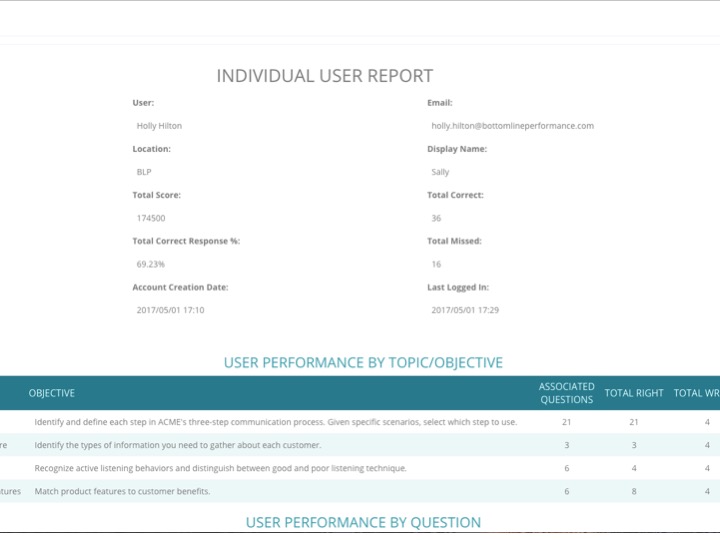
- If you want to know how a specific player is performing in the game, access the Player Progress Report.
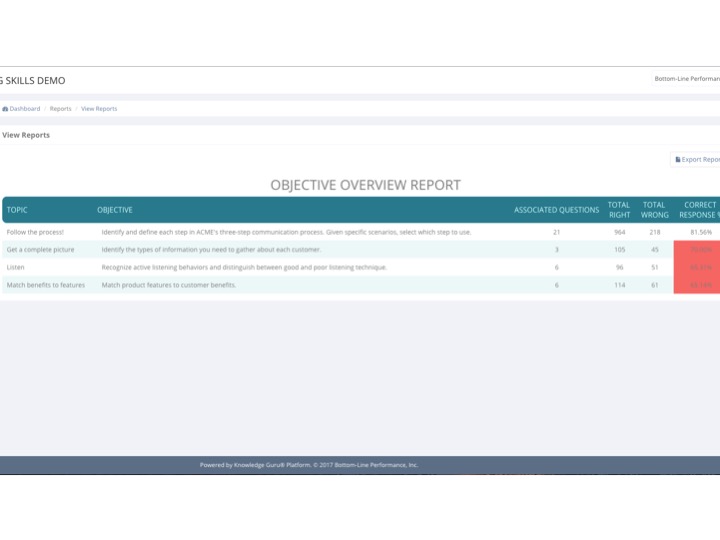
- If you want to see overall player performance across topics (how well are people doing as a big group), access the Objective Overview Report (macro view) or the Question Overview Report (micro view).
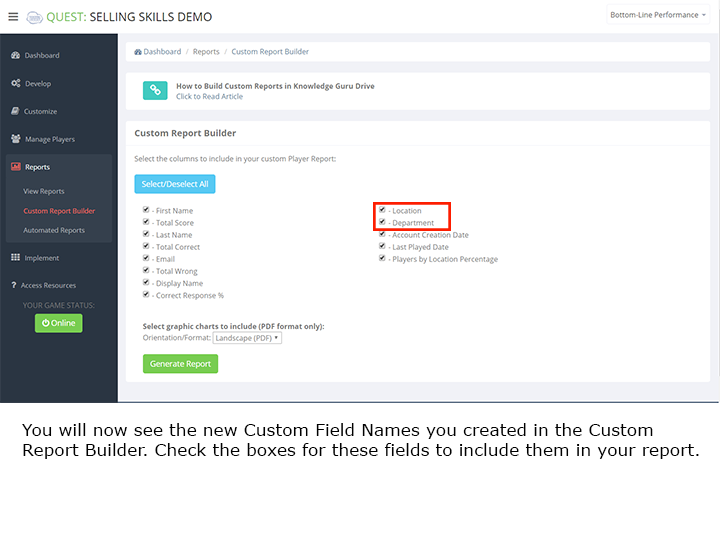
- If you want to compare performance across groups, you can access a report whose name will mirror whatever name you created for your first custom user registration field. Example: The default name for this field is Location so if you did not change this field name and you set up multiple location options, then you can pull a report that lets you see how people performed in specific locations. The default report name is Location Performance Report. If you changed the field name of Location to something else, the report name will reflect this change.
- If you want to verify that people’s performance is improving across the three iterations of a question, access the Question Overview report. The “A,” “B,” and “C” iterations of each question appear in this report. Ideally, people’s performance will improve from the “A” version to the “C” version. If you are not seeing this, consider whether your question is worded poorly. This report can be very useful in identifying questions that may be confusing to players.
Reports specific to Quest Game Type
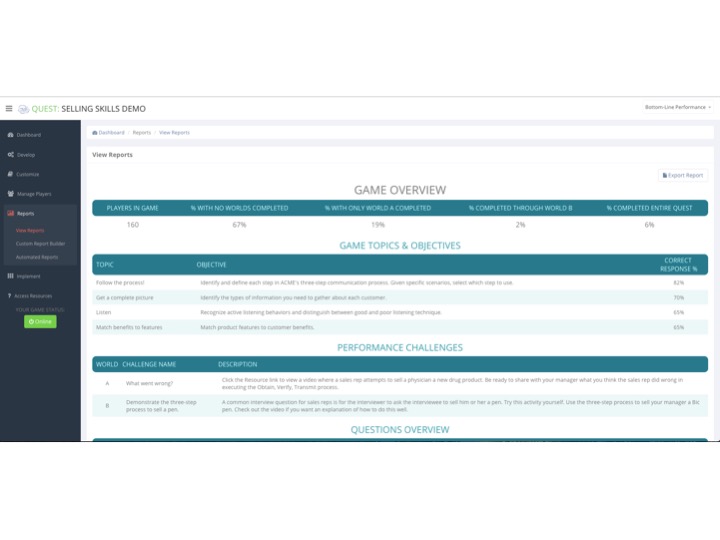
If you want to verify the number of players you have in the game and what their progress is within the game, access the Game Overview Report. This report tells you how many players you have, and what percentage have completed each World in the game so you can see how far most players have progressed. It also includes a detailed summary of your game’s topics, objectives, and questions and shows you the correct response % for those items. Finally, it lists the performance challenges that are part of your game.
This is a useful report to showcase to managers and stakeholders who want to see what a game is about and what content it includes.
PDF or CSV?
Many of the reports can be downloaded as a PDF or as a CSV file. Choose the CSV option if you think you might want to do further manipulation of the data. By downloading as a CSV, you can then re-save the report as an Excel spreadsheet, reformat it to your taste, and then sort the data to suit your needs.
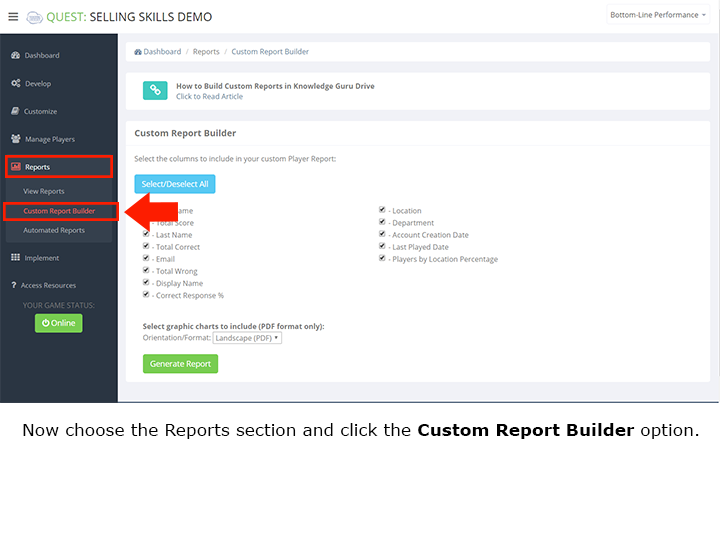
Custom Report Builder Option – Both Game Types
You may have a need for some very specific data – and not care about other data. You can use the Custom Report Builder to choose what information you include/exclude from a report.
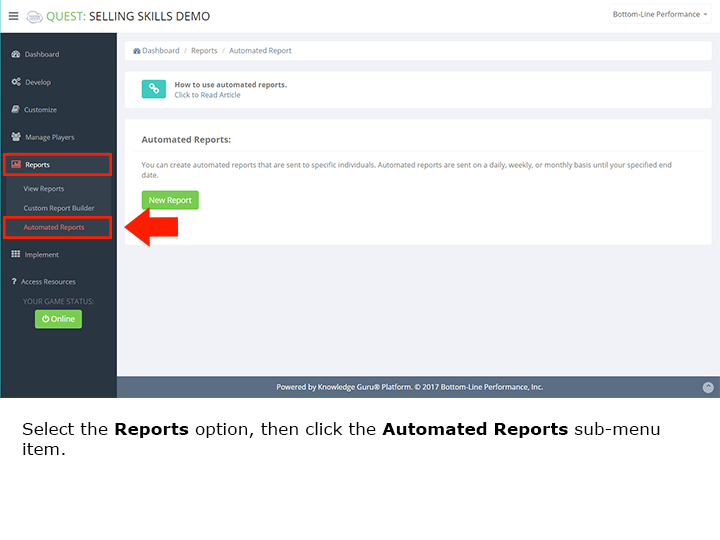
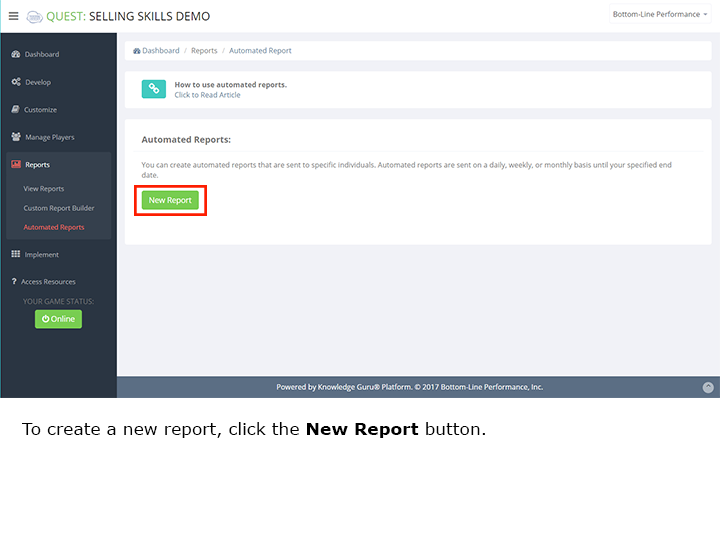
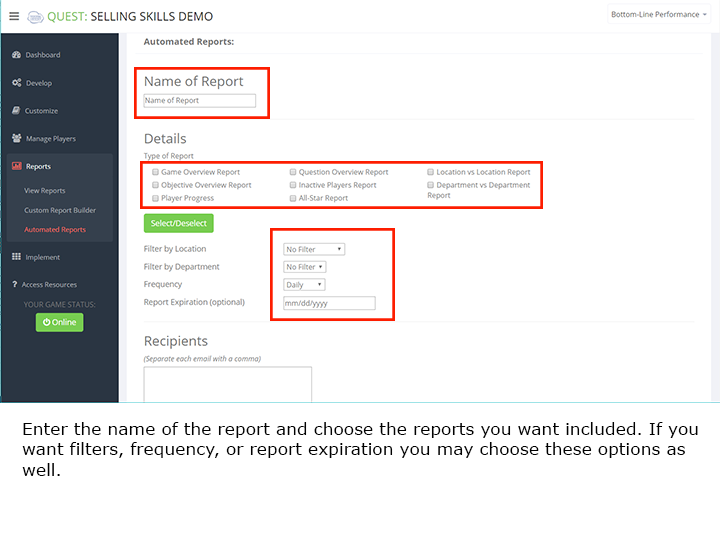
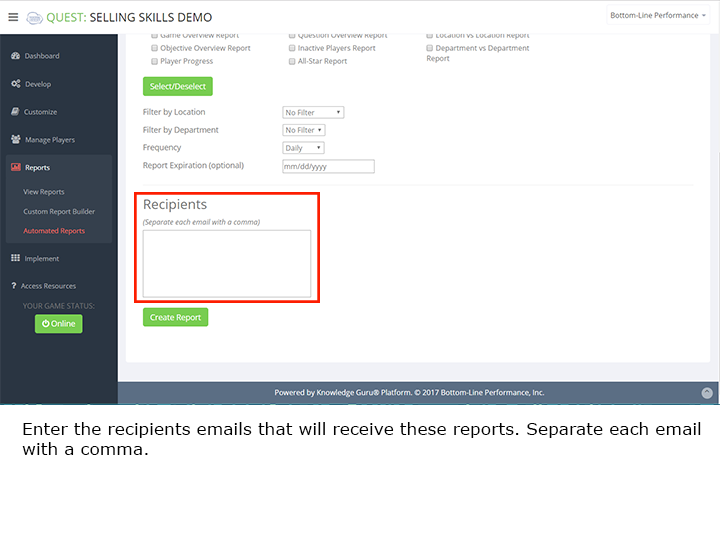
Auto Report Sender
You can create reports that are automatically sent to your stakeholders. Learn how here.