
How to Create and Edit Mini-Games
Drive currently has eight mini-games available to you with more mini-games available in future releases. Key things to know or do before authoring a single mini-game:
- Each of the eight mini-games has unique content requirements that will align with the learning objective you created. Consequently, each wizard provides you with different prompts to follow and fields to complete.
- Before you can create a mini-game, you need to define a topic and a learning objective associated with that topic.
- A mini-game can only be associated with a single learning objective. If your topic requires more than one learning objective, you must create a mini-game for EACH learning objective within the topic.
- Play each mini-game before authoring a Drive game experience. Doing so ensures you understand the player experience and the kind of content you will see within a particular type of mini-game.
- As you create your game, use the Preview Mini Game functionality within each mini-game authoring wizard to check out your game and verify that it works and looks as you envisioned it would. Do not make your Drive game experience live without previewing all the games you have created.
Creating a New Mini-Game
Assuming you have created a topic and a learning objective, here’s the process for creating a mini-game:
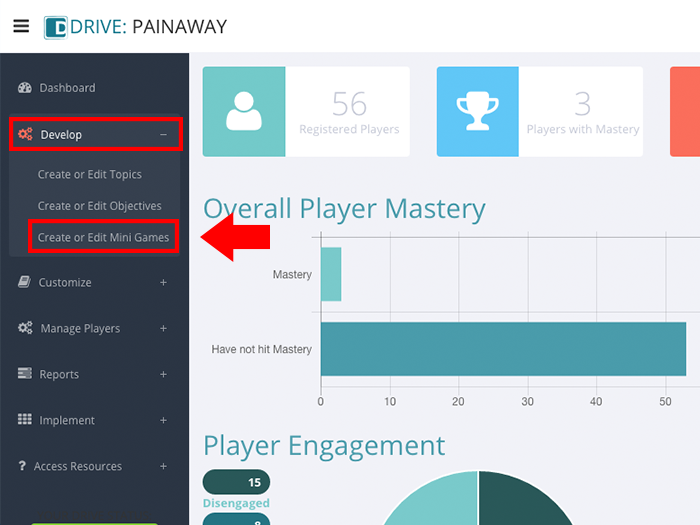
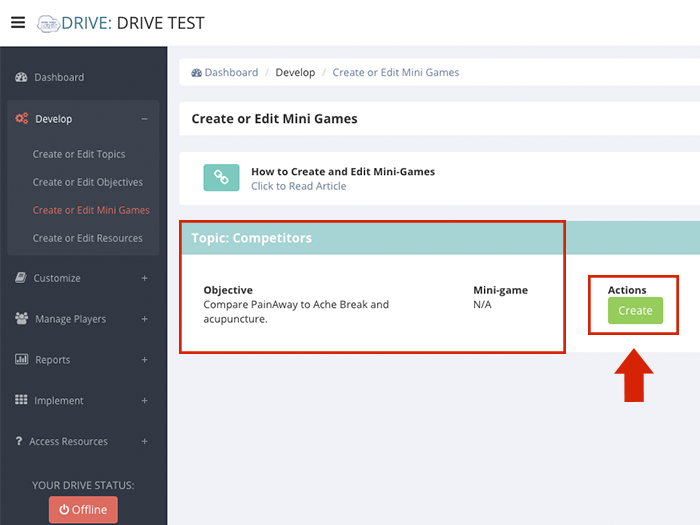
- Select Develop from the left-hand navigation pane, expanding this option to reveal sub-menu choices.
- Select Create or Edit Mini Games.
- Review the topic and objectives listed on the screen. Click CREATE next to the one for which you want to create a mini-game. A screen labeled Choose Mini Game will appear.
- The mini-games available will be highlighted. The choices available depend on the behavior you specified within your learning objective.
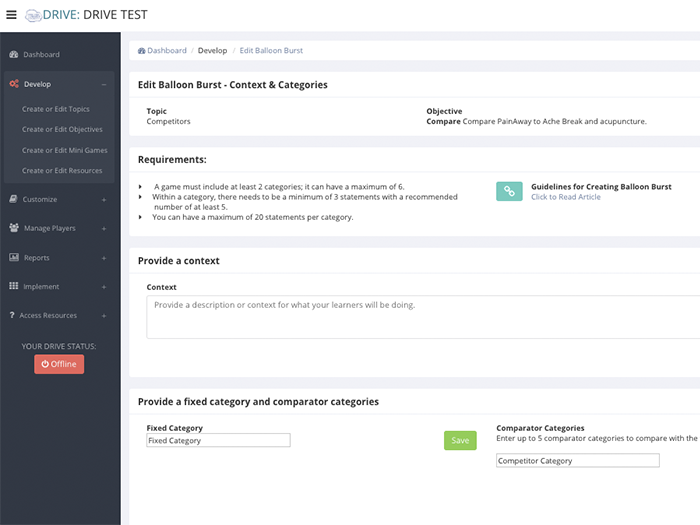
- From the mini-games available to you, click the one you want. This action opens the wizard for that mini-game.
- Proceed to input content, using the wizard associated with the mini-game you selected.


FAQs – Game Creation
- I chose a mini-game and then realized it wasn’t the one I wanted. How do I change it?
- Go back to Develop in left-hand navigation, expand it, and then select Create or Edit Mini Games. Choose REMOVE next to the topic/objective combination whose mini-game you want to delete. You will be asked to confirm your decision. Once you do so, you will once again see CREATE. You can then proceed through the process of selecting another mini-game.
- I only have one mini-game available to me based on the behavior I specified in the objective, and it is not the one I wanted. What do I do?
- Most of the time you should have two options available to you. However, there are a handful of behaviors for which only one mini-game is appropriate. The list of behaviors that are associated with each mini game is available here. You may want to review this list and consider how you can re-phrase your objective.
- I entered content, but it disappeared. What happened?
- Because of the logic required within the mini-games, one content entry must be saved before you move to a new field. Failure to use the SAVE button next to each field where one appears is the typical cause of content seeming to get “lost” or failing to be retained. Watch carefully for SAVE buttons and click them wherever you see them to avoid losing content you create.
Edit an Existing Mini-Game
- Expand Develop option within left-hand navigation pane, and select Create or Edit Mini Games.
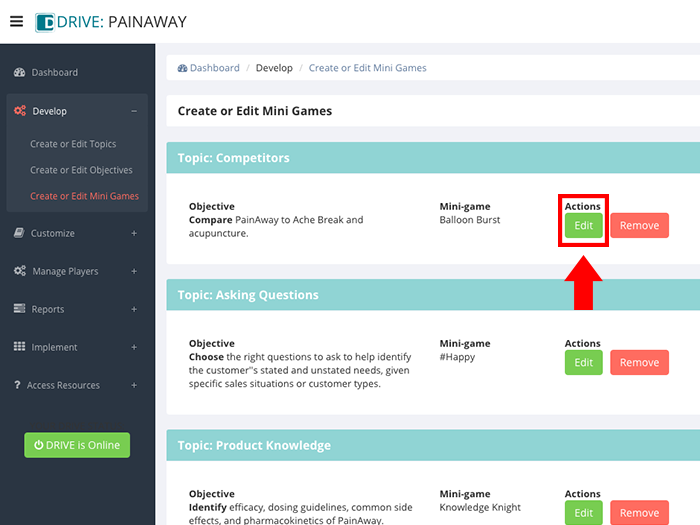
- Find the topic, objective, and corresponding mini-game you want to edit.
- Click EDIT (listed under Actions column on the screen).
- Within the wizard, enter your desired changes, being sure to click SAVE wherever a SAVE button is provided. Failing to do so may result in loss of content changes as many of the fields in the authoring wizards require a SAVE action after each entry.
Remove a Mini-Game
- Expand Develop option within left-hand navigation pane, and select Create or Edit Mini Games.
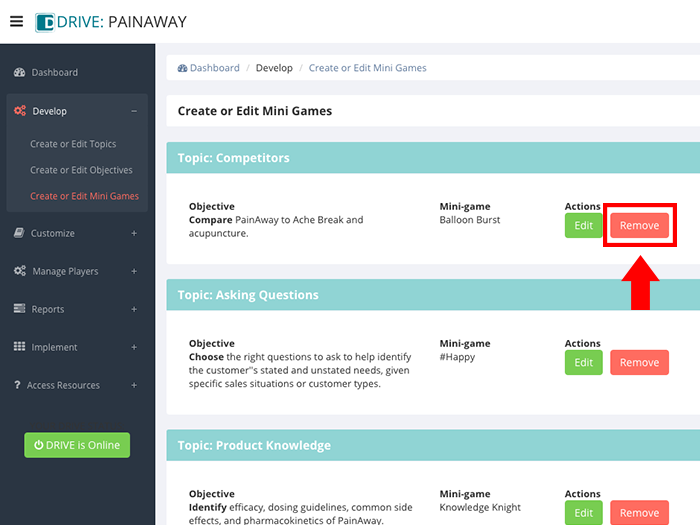
- Find the topic, objective, and corresponding mini-game you want to remove.
- Under Actions, click REMOVE. Be aware that selecting this option removes all content associated with the mini game.