
Spacing Options Available in Quest
Knowledge Guru allows you to customize how often players can access your Quest game. Game spacing can be a critical component of successful learning design. In fact, the key to long-term memory formation is not the amount of time spent learning, but the amount of time between learning.
Available Spacing Options
1. No Spacing (this is the default)
Use the default when you simply want people to play through the entire game at one time and you are content with a “micro-spaced” experience where people encounter repetitions of content within minutes.
2. Level a Day – limit play to a single level per day
Use “Level a Day” when you want to maximize game spacing and ensure that people encounter repetitions of content several days apart. This spacing is ideal for creating a microlearning experience.
3. World a Day – limit play to a single world (including all its levels) per day
“World a Day” may be a good option if you want learners to get through all the content quickly, but still want to provide some level of spacing. It also works well when setting up a short, time-based competition.
4. World a Week- limit play to a single world (including all its levels) per week
“World a Week” works particularly well if you use a Quest game as part of a multi-week course. Use it when you want to maximize game spacing and ensure that people encounter repetitions of content approximately 8 days apart. Research supports this spacing as being highly effective. A level of day also works well as a post-training reinforcement.
5. Manual – manually select what levels and worlds are available to your players
Authors have the option of adjusting level availability or they can schedule an entire world to unlock at a future date.
Quick Steps to Edit Game Spacing in Quest
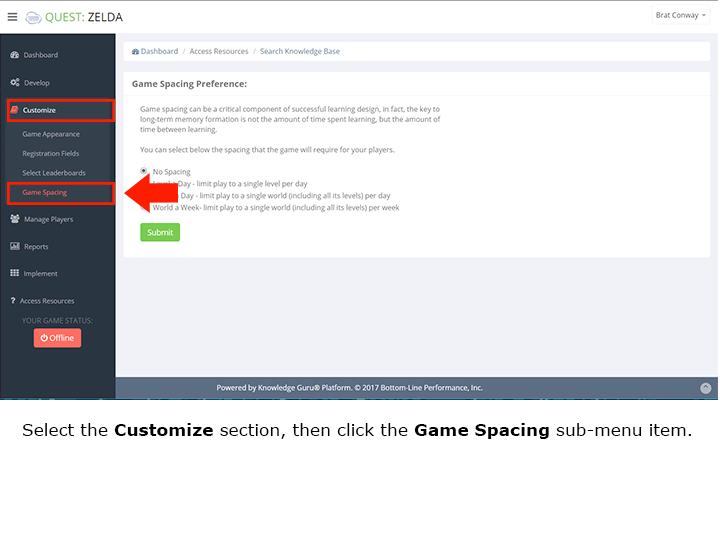
1. Select the Customize section in the left-hand menu, and choose Game Spacing.
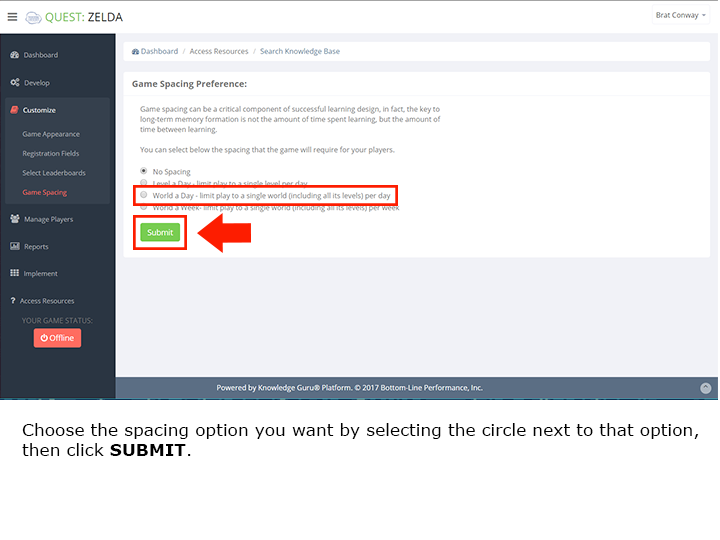
2. Choose the spacing option you want by selecting the circle next to that option.
3. Click SUBMIT.
Click through the slideshow below to see the steps in action.