
How to Manually Lock and Unlock Levels and Worlds in Quest
Manual spacing allows the game author to control what levels and worlds are available to their players. This is particularly useful when implementing your game as a daily or weekly competition. Authors have the option of immediately adjusting level availability or they can schedule an entire world to unlock at a future date.
Quick Steps to Adjust Level Availability
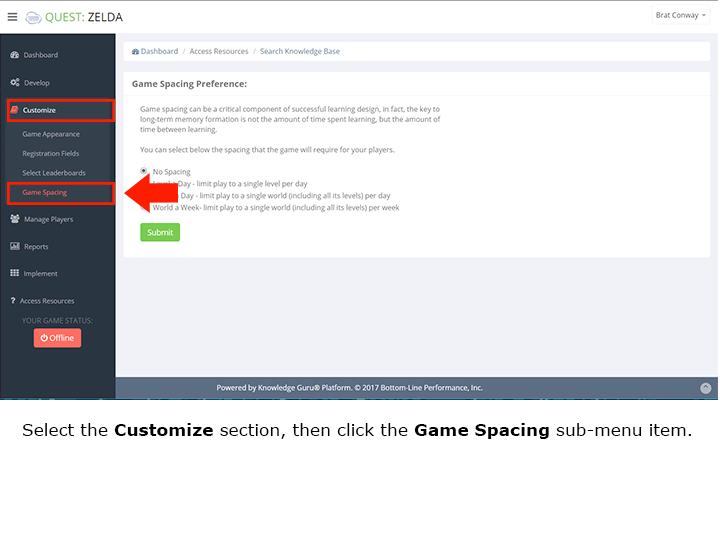
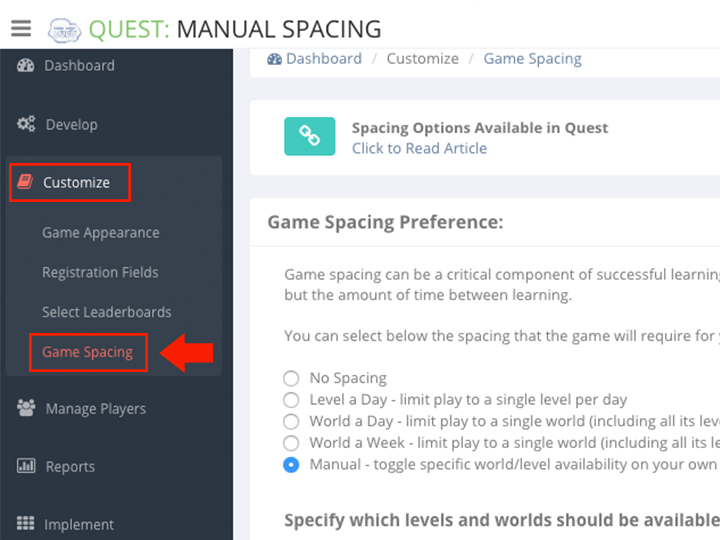
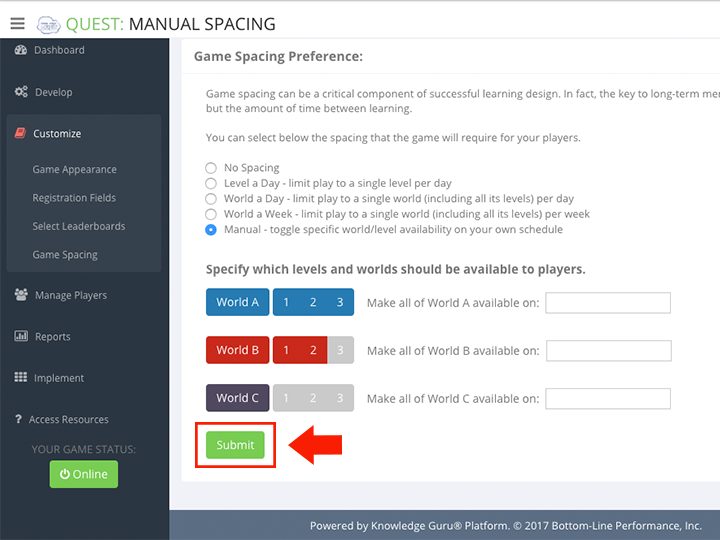
- Expand Customize option within left-hand navigation pane, and select Game Spacing.
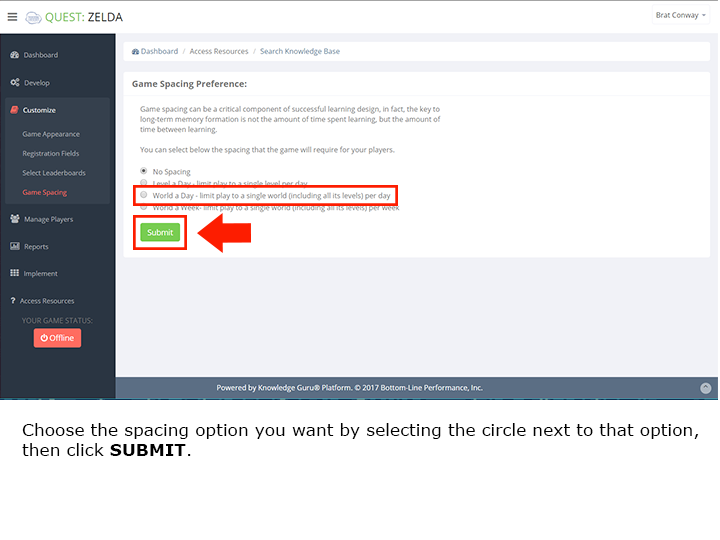
- Select the “Manual” option. A new interface appears.
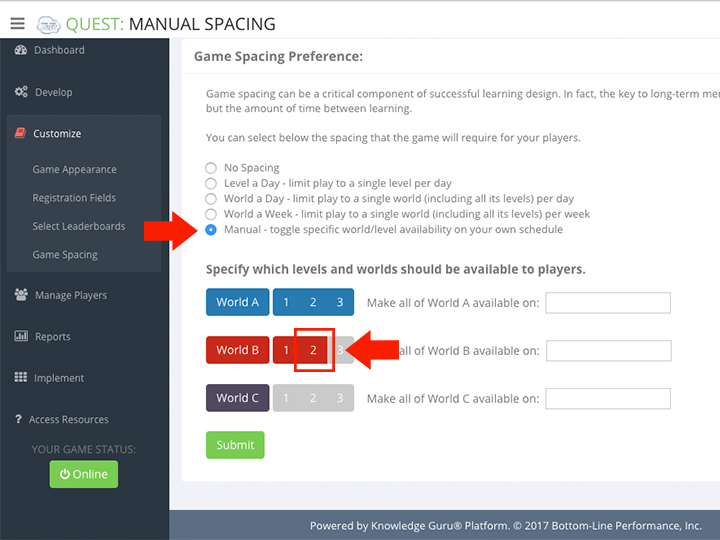
- Click the furthest level a player should be able to access. (Note that levels still need to be unlocked in order and once a player completes a level, that level will remain unlocked for them.)
- Click SUBMIT. The availability is immediately updated. (You can change this anytime.)

Quick Steps to Schedule a World to Unlock
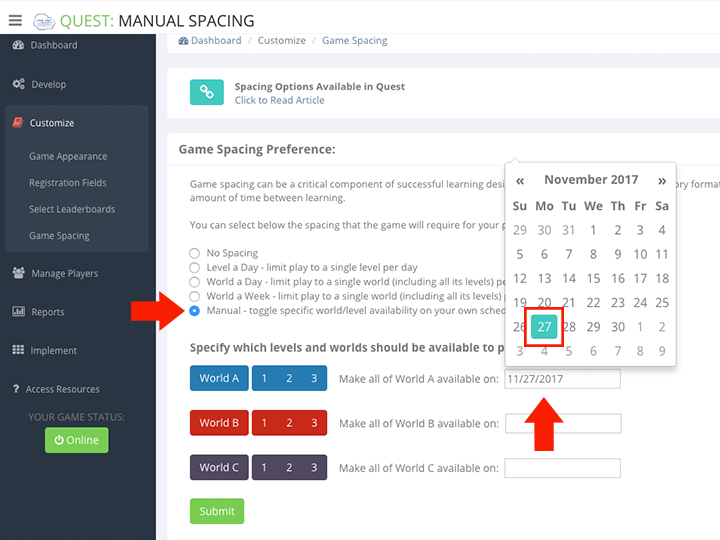
- Expand Customize option within left-hand navigation pane, and select Game Spacing.
- Select the “Manual” option. A new interface appears.
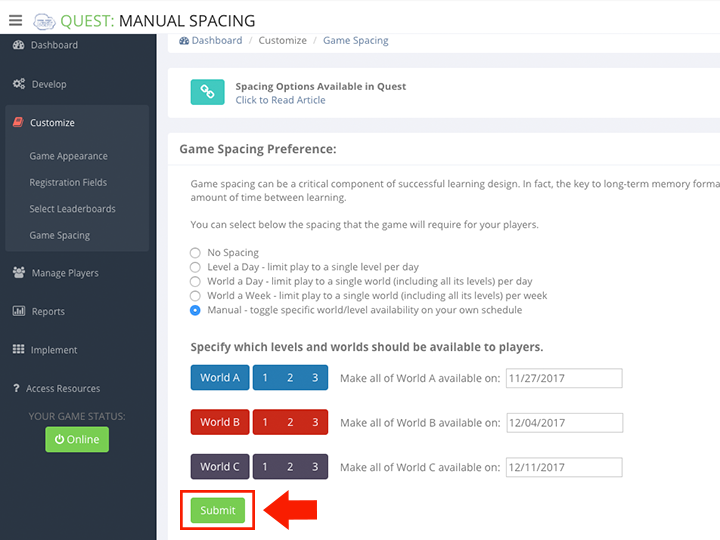
- There are three date-picker fields (one for each World). Select a date for each World to unlock. (Note that by unlocking a World that every level prior to that world will also be unlocked. In other words, setting World B to unlock will also unlock every level in World A.)
- Click SUBMIT. The unlocking is scheduled. (You can change this anytime.)


This is the email Knowledge Guru sends to players when a new level or world is unlocked if manual spacing is used and automatic emails are turned ON.